통합로그인 & Oauth2 발급을 만들게 되면서 이전에 SpringBoot에 설정한 Oauth2 발급서버(AuthroizationServer)를 그대로 사용할 수 없을거 같았다. 이전과 달리 이제는 어느 DB에 저장되어 있는지를 구분하기 위해 파라미터가 추가되어야 했던 것. 또한 각 서비스에 따라 비밀번호 암호화가 달랐는데, 그래서 서비스별로 패스워드 비교를 분리해야했다. 이 두가지를 커스텀 하기 위해서 Oauth2 발급 서버를 변경해야만 했다.
일단 이전 시스템에서 AuthorizationServer 에서 password 방식으로 인증할땐 파라미터가 4개다.
- username
- password
- grant_type
- scope
그런데 이번에 추가되어야 할 것은
1) 어떤 서비스의 유저인지(service_type)
2) 비밀번호 비교 방식을 커스텀하여 유저정보를 객체에 담아 리턴
3) (가능하다면) parameter key 이름 변경
두가지를 해결해야 했다.
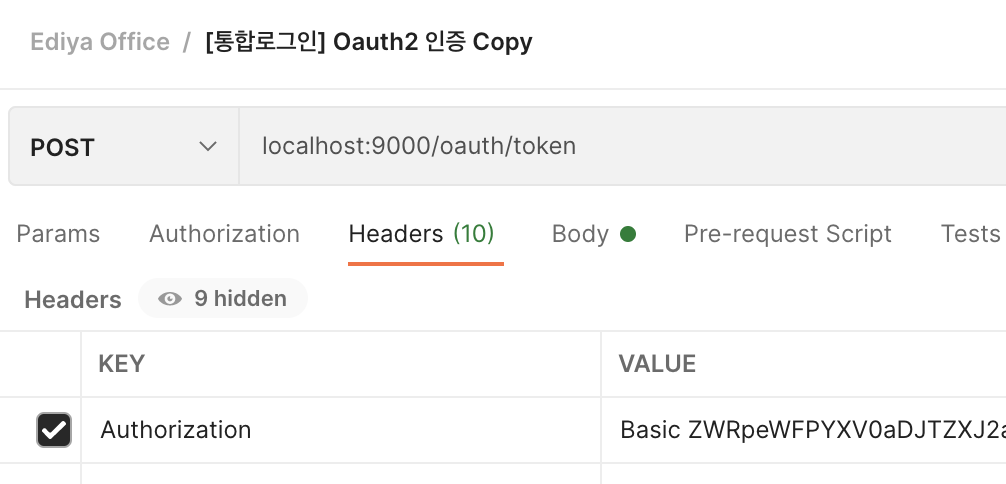
일단 이전처럼 토큰을 인증하는 URL은 /oauth/token 로 요청해야 한다. 이 방식은 그대로 유지하기로 했다. 그리고 Header에 Authorization을 담을 때 사용한 Basic 은 그대로 사용한다.
우선 요구사항을 만족하기 위해선 AuthenticationManager를 바꿔야한다 이전설정을 살펴보면 AuthenticationManager를 등록하는 것은 AuthorizationServerConfigurerAdapter 가 구현된 클래스다. 예를들어 다음과 같다.
@Configuration
@EnableAuthorizationServer
public class AuthorizationServerConfig extends AuthorizationServerConfigurerAdapter {
...
    AuthenticationManager authenticationManager;
    public AuthorizationServerConfig(AuthenticationConfiguration authenticationConfiguration
        , PasswordEncoder passwordEncoder) throws Exception {
        this.authenticationManager = authenticationConfiguration.getAuthenticationManager();
        this.passwordEncoder = passwordEncoder; // passwordEncoder는 다른 설정에서 빈등록 했기에 주입받을 수 있었다
    }

    // 이전과 설정이 같음
    @Override
    public void configure(AuthorizationServerEndpointsConfigurer endpoints) throws Exception {
        endpoints.authenticationManager(authenticationManager);
    }

    // 이전 설정과 같음
    @Override
    public void configure(ClientDetailsServiceConfigurer clients) throws Exception {
        clients.inMemory()
                .withClient(oauth2ClientId)
                .secret(passwordEncoder.encode(oauth2Sercet))
                .redirectUris("/oauth2/callback")
                .autoApprove(true)
                .scopes("read", "write")
                .authorizedGrantTypes("password", "refresh_token");
    }
...
authenticationConfiguration 를 주입받아서 AuthenticationManager를 꺼냈다. 그러나 이번에는 AuthenticationManager를 직접 등록할 것이다. 다음의 파일을 생성해보자.
@Configuration
public class CustomAuthenticationManager implements AuthenticationManager {
    @Override
    public Authentication authenticate(Authentication authentication) throws AuthenticationException {
        System.out.println("authentication.getPrincipal() = " + authentication.getPrincipal());
        System.out.println("authentication.getCredentials() = " + authentication.getCredentials());
        System.out.println("authentication.getDetails() = " + authentication.getDetails());

        return authentication;
    }
}
이렇게 AuthenticationManager를 직접 구현하면 AuthorizationServerConfigurerAdapter 에서 파일을 생성할때 주입받는 AuthenticationConfiguration 에 자동 주입된다.
그럼 이제 Request를 통해 어떤 파라미터가 담겨져 있는지 살펴보자. 파라미터 중 서비스를 구분하여
이제 호출을 해보려 한다. 위 설정에서 다음의 파라미터를 추가해 검토한다.
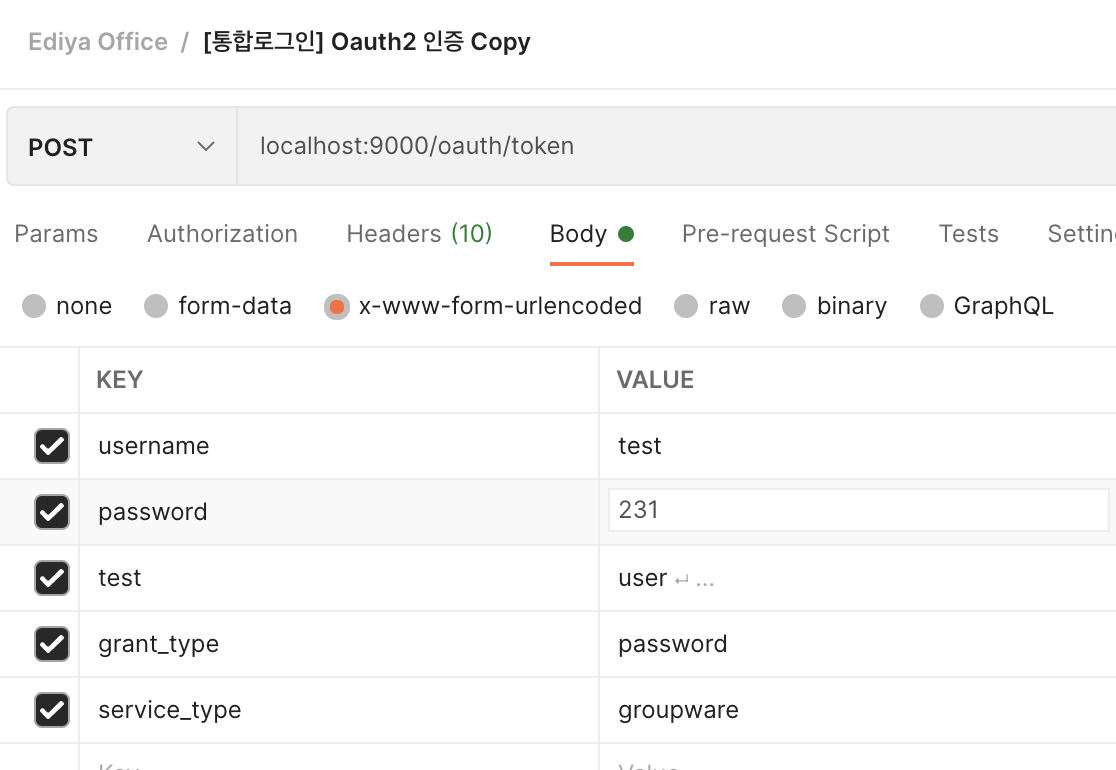
로그를 찍어보면 의도한대로 service_type이 추가되어 들어옴을 확인할 수 있다.
authentication.getPrincipal() = test
authentication.getCredentials() = 231
authentication.getDetails() = {service_type=groupware, test=user, grant_type=password, username=test}
그런데 다음과 같은 Error 문구가 보인다.
: HikariPool-1 - Thread starvation or clock leap detected (housekeeper delta=50s161ms).
: Handling error: InvalidGrantException, Could not authenticate user: test
: Resolved [error="invalid_grant", error_description="Could not authenticate user: test"]
인증에 실패했는데, 해당 값이 디버그로 보니 false로 되어 있었기 때문이다.
간단하게 생각해서 authenticate 에서 authenticated를 true로 설정하면 될 줄 알고 다음과 같이 설정했다. 그러니 이젠 다음의 에러가 발생했다.
...
    @Override
    public Authentication authenticate(Authentication authentication) throws AuthenticationException {
        System.out.println("authentication.getPrincipal() = " + authentication.getPrincipal());
        System.out.println("authentication.getCredentials() = " + authentication.getCredentials());
        System.out.println("authentication.getDetails() = " + authentication.getDetails());

        authentication.setAuthenticated(true); // 추가
        return authentication;
    }
...
: Handling error: IllegalArgumentException, Cannot set this token to trusted - use constructor which takes a GrantedAuthority list instead
: Resolved [java.lang.IllegalArgumentException: Cannot set this token to trusted - use constructor which takes a GrantedAuthority list instead]사실 위 방식은 정답이 아니다. 생성할때부터 신뢰할 수 있는 토큰을 만들어야 한다는 뜻으로 단순히 인증을 true로 변경하라는 의미는 아니다.
그럼 어떻게 하면 될까?
우선 이것을 호출하는 부분을 살펴보자.
TokenEndpoint.java 파일을 보면 호출하는 /oauth/token 을 POST로 받는 메서드가 있다.
...
	@RequestMapping(value = "/oauth/token", method=RequestMethod.POST)
	public ResponseEntity<OAuth2AccessToken> postAccessToken(Principal principal, @RequestParam
	Map<String, String> parameters) throws HttpRequestMethodNotSupportedException {
...
        OAuth2AccessToken token = getTokenGranter().grant(tokenRequest.getGrantType(), tokenRequest);
...
    }
메서드 안을 살펴보면 중간에 OAuth2AccessToken 을 호출하는 부분이 있는데, 토큰생성 관련 메서드다. 해당 메서드를 쫓아가다보면 ResourceOwnerPasswordTokenGranter 클래스 내 getOAuth2Authentication 를 호출한다.
public class ResourceOwnerPasswordTokenGranter extends AbstractTokenGranter {
...
	@Override
	protected OAuth2Authentication getOAuth2Authentication(ClientDetails client, TokenRequest tokenRequest) {

		Map<String, String> parameters = new LinkedHashMap<String, String>(tokenRequest.getRequestParameters());
		String username = parameters.get("username");
		String password = parameters.get("password");
		// Protect from downstream leaks of password
		parameters.remove("password");

		Authentication userAuth = new UsernamePasswordAuthenticationToken(username, password);
		((AbstractAuthenticationToken) userAuth).setDetails(parameters);
		try {
			userAuth = authenticationManager.authenticate(userAuth);
		}
		catch (AccountStatusException ase) {
			//covers expired, locked, disabled cases (mentioned in section 5.2, draft 31)
			throw new InvalidGrantException(ase.getMessage());
		}
		catch (BadCredentialsException e) {
			// If the username/password are wrong the spec says we should send 400/invalid grant
			throw new InvalidGrantException(e.getMessage());
		}
		if (userAuth == null || !userAuth.isAuthenticated()) {
			throw new InvalidGrantException("Could not authenticate user: " + username);
		}

		OAuth2Request storedOAuth2Request = getRequestFactory().createOAuth2Request(client, tokenRequest);
		return new OAuth2Authentication(storedOAuth2Request, userAuth);
	}
...
해당 메서드를 보면 key를 username, password으로 고정한다. 이후 중간에 authenticationManager.authenticate(userAuth) 를 호출하는데, 이 부분이 우리가 등록한 CustomAuthenticationManager 클래스의 authenticate 메서드를 호출하는 것이다.
호출하기 직전을 살펴보면 UsernamePasswordAuthenticationToken 클래스를 생성하는데, 생성자를 보면 authenticated 가 false로 들어간다. principal 은 username이 credentials는 password가 들어간다.
...
	public UsernamePasswordAuthenticationToken(Object principal, Object credentials) {
		super(null);
		this.principal = principal;
		this.credentials = credentials;
		setAuthenticated(false);
	}
...
그래서 CustomAuthenticationManager 의 authenticate 에서 넘겨받은 Authentication 객체에서 principal과 credentials를 통해 username, password를 확인이 가능하다.
@Configuration
public class CustomAuthenticationManager implements AuthenticationManager {
    @Override
    public Authentication authenticate(Authentication authentication) throws AuthenticationException {
        System.out.println("authentication.getPrincipal() = " + authentication.getPrincipal());
        System.out.println("authentication.getCredentials() = " + authentication.getCredentials());
        System.out.println("authentication.getDetails() = " + authentication.getDetails());
...
그리고 여기서 authenticated를 true로 token 생성하여 리턴하도록 한다. 그리고 임의로 authority에 ROLE_CLIENT 로 넣는다.
@Configuration
public class CustomAuthenticationManager implements AuthenticationManager {
    @Override
    public Authentication authenticate(Authentication authentication) throws AuthenticationException {
        System.out.println("authentication.getPrincipal() = " + authentication.getPrincipal());
        System.out.println("authentication.getCredentials() = " + authentication.getCredentials());
        System.out.println("authentication.getDetails() = " + authentication.getDetails());

        ArrayList<GrantedAuthority> grantedAuths = new ArrayList<>();
        grantedAuths.add(new SimpleGrantedAuthority("ROLE_CLIENT"));
        Authentication customAuthentication = new UsernamePasswordAuthenticationToken(
                authentication.getPrincipal()
                , authentication.getCredentials()
                , grantedAuths);

        return customAuthentication;
    }
...
이제 호출해보면 토큰이 생성되는 것을 확인할 수 있다.

그럼 이제 해당 토큰이 유용한지 확인해보자.
ResourceServerConfigurerAdapter 를 구현한 클래스를 생성, 등록한다.
내 경우 /api/check 를 통해서만 해당 토큰이 유용한지 체크하려 한다.
@Configuration
@EnableResourceServer
public class ResourceServerConfig extends ResourceServerConfigurerAdapter {

    @Override
    public void configure(HttpSecurity http) throws Exception {
        http.anonymous().disable()
                .authorizeRequests()
                .antMatchers("/api/check").authenticated()
                .and()
                .exceptionHandling()
                .accessDeniedHandler(new OAuth2AccessDeniedHandler());
    }
}
그리고 컨트롤러 하나 만든다.
@RestController
public class AuthController {
...
    @PostMapping("/api/check")
    public ResponseOauthInfo check(Principal principal) {
        System.out.println("principal = " + principal);
    }
...
Header에 Authorization 을 설정한다음 호출해보면 다음과 같은 로그를 확인할 수 있다.
principal = org.springframework.security.oauth2.provider.OAuth2Authentication@97f3710c: Principal: test; Credentials: [PROTECTED]; Authenticated: true; Details: remoteAddress=0:0:0:0:0:0:0:1, tokenType=bearertokenValue=<TOKEN>; Granted Authorities: ROLE_CLIENT그래서 output을 위해 다음 클래스를 만든다음 리턴했다.
@Getter
public class ResponseOauthInfo {
    private String username;
    private List<String> authorities;

    public ResponseOauthInfo(String username, List<String> authorities) {
        this.username = username;
        this.authorities = authorities;
    }
}
...
@PostMapping("/api/check")
public ResponseOauthInfo check(Principal principal) {
System.out.println("principal = " + principal);
String username = principal.getName();
List<String> authorities = ((OAuth2Authentication) principal).getAuthorities()
.stream().map(o -> o.getAuthority()).collect(Collectors.toList());
return new ResponseOauthInfo(username, authorities);
}
...결과

구조는 이제 파악되었으니 처음에 제시한 조건들을 클리어해보자
처음 조건은 다음 둘이었다.
1) 어떤 서비스의 유저인지(service_type)
2) 비밀번호 비교 방식을 커스텀하여 유저정보를 객체에 담아 리턴
3) (가능하다면) parameter key 이름 변경
2번의 경우 UsernamePasswordAuthenticationToken 를 생성하면서 principal 에다가 username을 입력하여 넣기 때문에 username(로그인 ID)는 바로 해결된다.
1) 어떤 서비스의 유저인지(service_type)
첫번째 조건인 service_type 이 무엇인지 확인할 수 있는 것은 getDetails()에서 살펴볼 수 있다.
문제는 이게 Object이기 떄문에 Map형태로 변경하면 사용하기 편할 거 같다. 그러기 위해 ObjectMapper 를 이용한다.
ObjectMapper를 빈으로 만든다.
@Configuration
@RequiredArgsConstructor
public class OtherConfig {
    @Bean
    public ObjectMapper objectMapper() {
        return new ObjectMapper();
    }
}
ObjectMapper 를 이용해 Details를 Map으로 치환한다.
...
    @Override
    public Authentication authenticate(Authentication authentication) throws AuthenticationException {

        System.out.println("authentication.getPrincipal() = " + authentication.getPrincipal());
        System.out.println("authentication.getCredentials() = " + authentication.getCredentials());
        System.out.println("authentication.getDetails() = " + authentication.getDetails());
        Object details = authentication.getDetails();

        HashMap detailsMap = objectMapper.convertValue(details, HashMap.class);
        System.out.println("detailsMap = " + detailsMap);
...
로그를 보면 다음과 같이 변환이 된 것이 확인된다
authentication.getPrincipal() = test
authentication.getCredentials() = 231
authentication.getDetails() = {service_type=groupware, test=user, grant_type=password, username=test}
detailsMap = {service_type=groupware, test=user, grant_type=password, username=test}
그럼 이제 service_type을 이용해 다음의 분기점을 만든다.
...
        if(detailsMap.containsKey("service_type") == false) {
            throw new RuntimeException("서비스 유형(service_type)은 필수입니다");
        }
...
문제는 Exception에 메세지를 담아 던지더라도 로그에만 보일 뿐 호출하는 쪽에서는 다음처럼 어떤 이유로 안되는지 알 수 없다
로그는 이렇게 보이지만
o.s.s.o.provider.endpoint.TokenEndpoint  : Handling error: RuntimeException, 서비스 유형(service_type)은 필수입니다
.m.m.a.ExceptionHandlerExceptionResolver : Resolved [java.lang.RuntimeException: 서비스 유형(service_type)은 필수입니다]
실제 호출한 쪽에선 알 수 없다.
{
    "error": "server_error",
    "error_description": "Internal Server Error"
}
이 부분을 해결하기 위해선 전에 포스팅한 내용을 참조하면 좋다
[spring security] token 요청 시 에러 Exception 핸들링하기(/oauth/token 에러, ControllerAdvice 적용안됨)
서버중에 oauth2를 발급하는 서버가 있는데, 계정과 비밀번호를 틀리게 되었을 때 다음처럼 리턴값을 받게 된다 문제는 이 리턴방식이 회사에서 규격하는 form과 다를 확률이 높다는 점이다. 이 경
lemontia.tistory.com
그럼 서비스별로 로그인을 체크하도록 하자.
service_type을 체크하여 각각 로그인에 필요한 토큰을 생성한다.
아래를 응용하여 서비스별로 로그인 체크 & 토큰 생성(ROLE 추가)를 분리하면 된다.
...
        Authentication customAuthentication = null;

        String serviceType = (String) detailsMap.get("service_type");
        if(serviceType.equals("client")) {
            // 로그인 체크
            // To do...

            // (유저 체크 성공 시) authentication 생성
            ArrayList<GrantedAuthority> grantedAuths = new ArrayList<>();
            grantedAuths.add(new SimpleGrantedAuthority("ROLE_CLIENT"));
            customAuthentication = new UsernamePasswordAuthenticationToken(
                    authentication.getPrincipal()
                    , authentication.getCredentials()
                    , grantedAuths);
        }

        return customAuthentication;
...
3) (가능하다면) parameter key 이름 변경
만약 username이 아닌 다른걸로 로그인을 체크하고 싶다면 Request를 이용해 파라미터를 조절할 수 있다.
...
    @Override
    public Authentication authenticate(Authentication authentication) throws AuthenticationException {
        HttpServletRequest request = ((ServletRequestAttributes) RequestContextHolder.getRequestAttributes())
                .getRequest();
        Enumeration<String> parameterNames = request.getParameterNames();
        while (parameterNames.hasMoreElements()) {
            String key = parameterNames.nextElement();
            System.out.println("key: value => " + key + ":" + request.getParameter(key));
        }
...
로그를 통해 파라미터 확인이 가능했다.
key: value => grant_type:password
key: value => id:test
key: value => pw:231
key: value => service_type:GROUPWARE
이렇게 될경우 넘어온 authentication 안에 값 (pricipal, credentials) 은 null 로 들어있다.(상세한건 위에 설명)
끝.
'공부 > 프로그래밍' 카테고리의 다른 글
| [swagger] ResourceServer 설정(HttpSecurity)으로 인해 UI접근이 안될 때 (0) | 2021.03.08 |
|---|---|
| [jpa] No qualifying bean of type EntityManagerFactoryBuilder 에러 (3) | 2021.03.05 |
| [spring] log4j 에서 logback 으로 변경하기 (0) | 2021.03.02 |
| [springboot] 이미지 s3에 저장하기(파일 업로드) (0) | 2021.02.22 |
| [springboot] aws sdk 에러(SdkClientException: Failed to connect to service endpoint) 안띄우기 (1) | 2021.02.19 |


댓글