엘라스틱서치를 직접 설치해서 사용하는 방법도 있겠지만 이번 회사에서 이슈가 있어 Elastic Cloud를 사용하기로 했다. 별도로 설치 및 관리하는것보다 관리되어있는 것을 사용하는게 더 낫다고 생각했기 때문이다.
내 경우 GCP를 이용한 Elastic Cloud를 이용하는 것을 했지만 Elastic Cloud에 직접 회원가입해서 사용한것도 가능할것 같다. 다만 여기서는 GCP를 이용했으니 그에따른 경과를 기록한다.
이 포스팅은 다음 순서로 진행된다.
- GCP에서 엘라스틱서치 사용하기
- SpringBoot 에 elastic search 연동
- SpringBoot 에서 elastic search 조회하기
- SpringBoot 에서 elastic search bulk 하기
그럼 시작.
GCP에 elastic cloud 사용하기
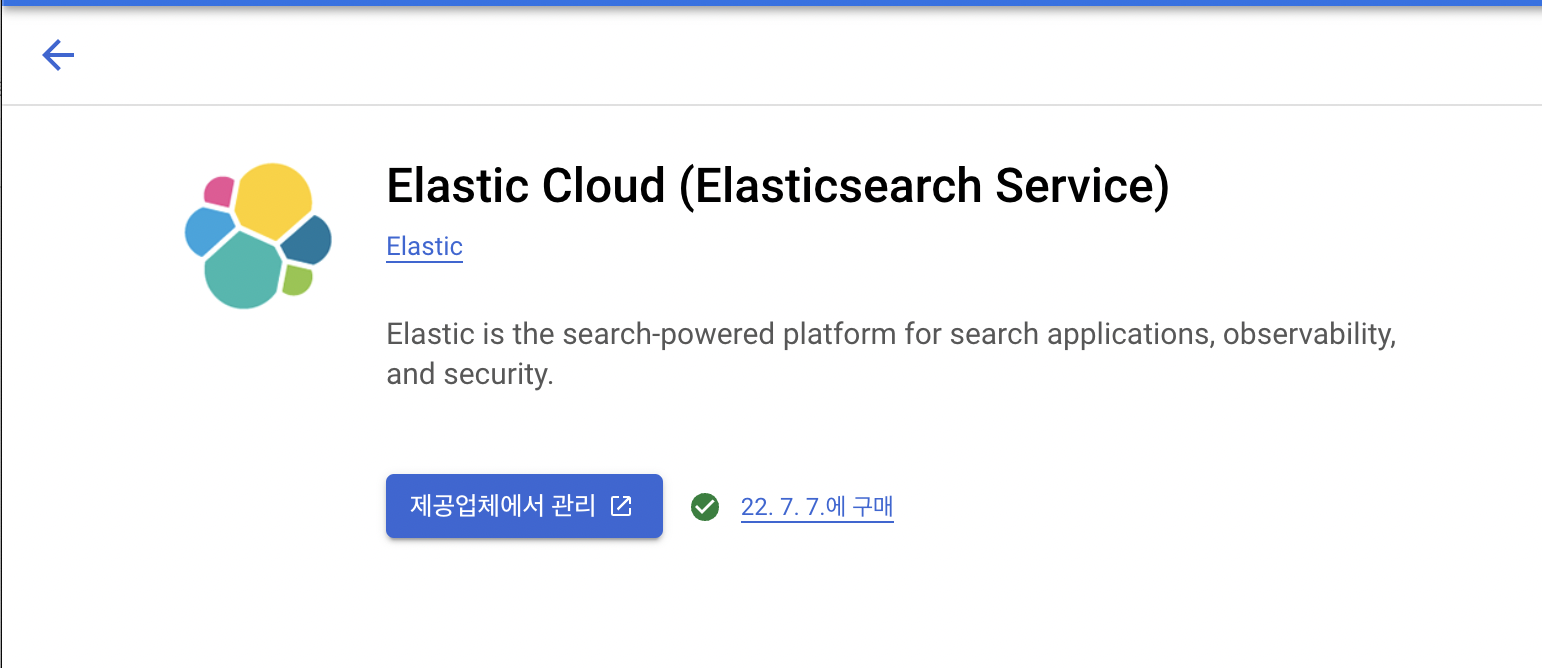
GCP에서 Elastic 이라고 검색하면 Elastic Cloud가 나온다. 이전 포스팅을 보면 구글 인스턴스에다가 띄워서 보이는 화면을 볼 수 있는데 최근에 제공업체에서 관리하는 방식으로 변경된 거 같다. 그래도 이렇게쓰면 좋은점은 요금체계가 구글GCP에 포함되서 나간다는 점. 가격이 무엇이 저렴한지는 굳이 찾아보지 않았다.(어차피 회사 플젝에서 쓸거였기 때문에 GCP에서 통합 빌링 되는게 더 낫다고 생각한 탓도 있다)
암튼 Elastic Cloud 화면에서 활성화를 하면 아래처럼 제공업체에서 관리 버튼이 활성화 된다. 클릭하면 cloud.elastic.co 페이지로 이동하게 된다.
내 경우는 회원가입은 완료했고, 서비스를 실행해두었다. 이게 좋은점이 다음 세트를 하나로 묶어 팔기 때문이다.
즉 아래 것들을 각각 설치할 필요가 없다.
- Elastic Search
- Kibana
- APM & Fleet
- Enterprise Search
다만 설치할때 주의점이 있는데 Spring Data의 elasticsearch를 이용하려면 7.x 버전을 설치해야 한다. 8.x를 설치하면 조회는 잘 되는데 index, bulk 등 데이터조작을 하게될때 문제가 발생한다.(그걸 한참뒤에 알아서 처음부터 다시 설치했다.)
생성할때 아래의 조건으로 설정했고, 가장 낮은사양으로 설정하면 시간당 $0.035 가 나온다. 한달기준 $ 25.20.
아직 고도화보다는 간단한 작업만 할 것이기에 가장 낮은 사양으로 선택했다.

advanced settings를 이용해 상세설정 할 수 있다. 최저로 하기위해 single zone으로 변경했으며 autoscale 등은 체크하지 않았다.
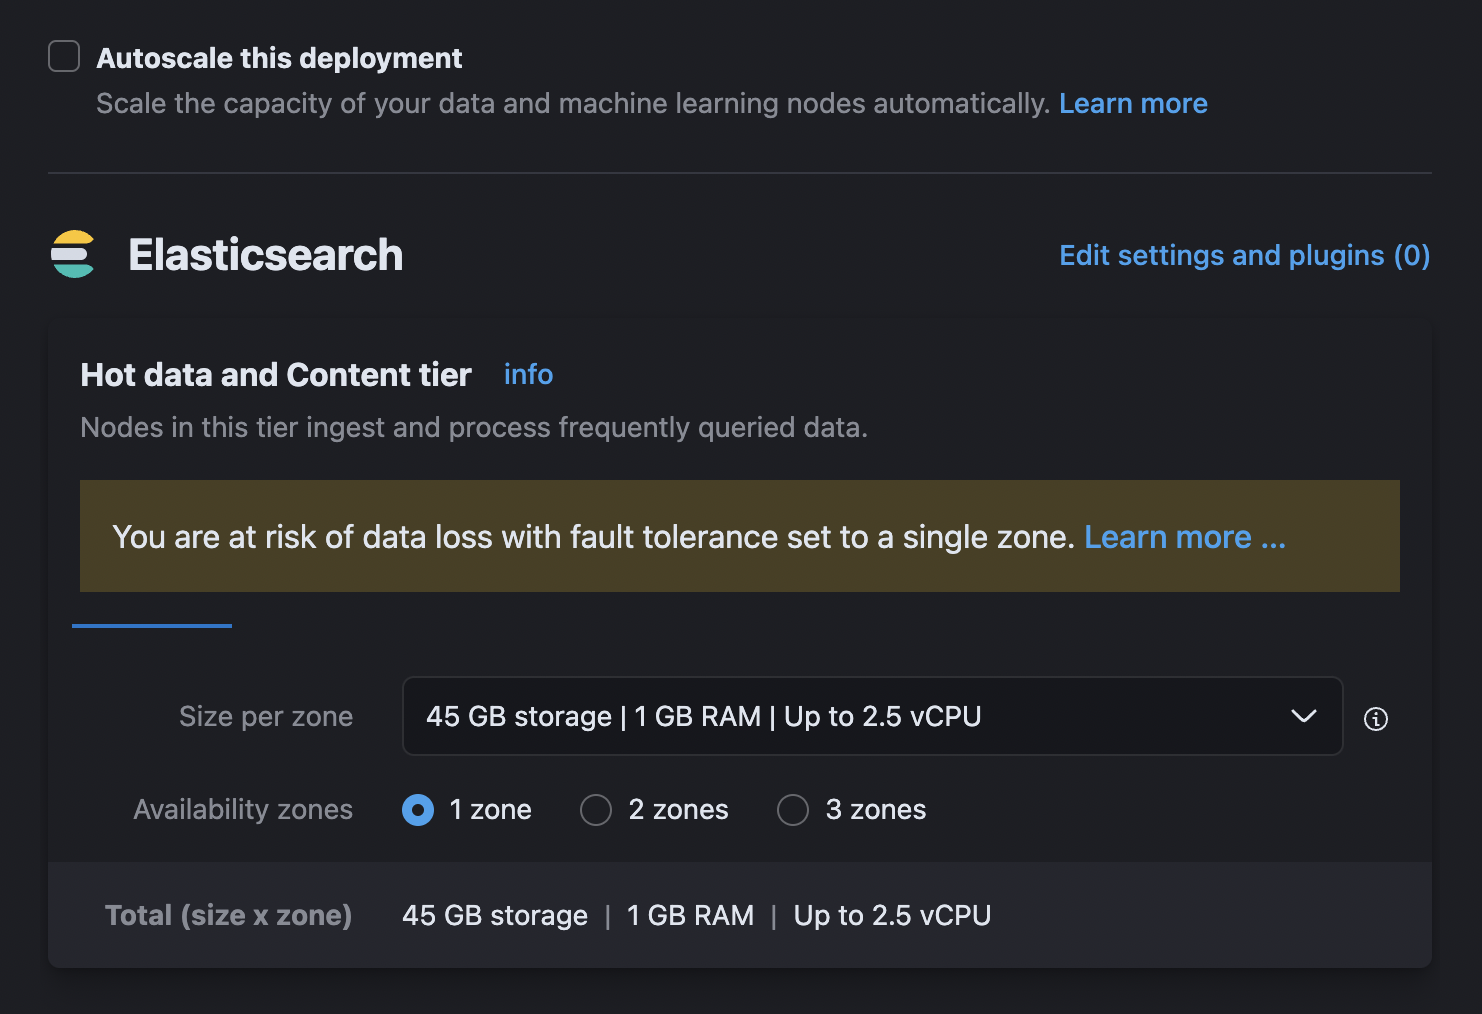
각각 최저사양을 입력했다.
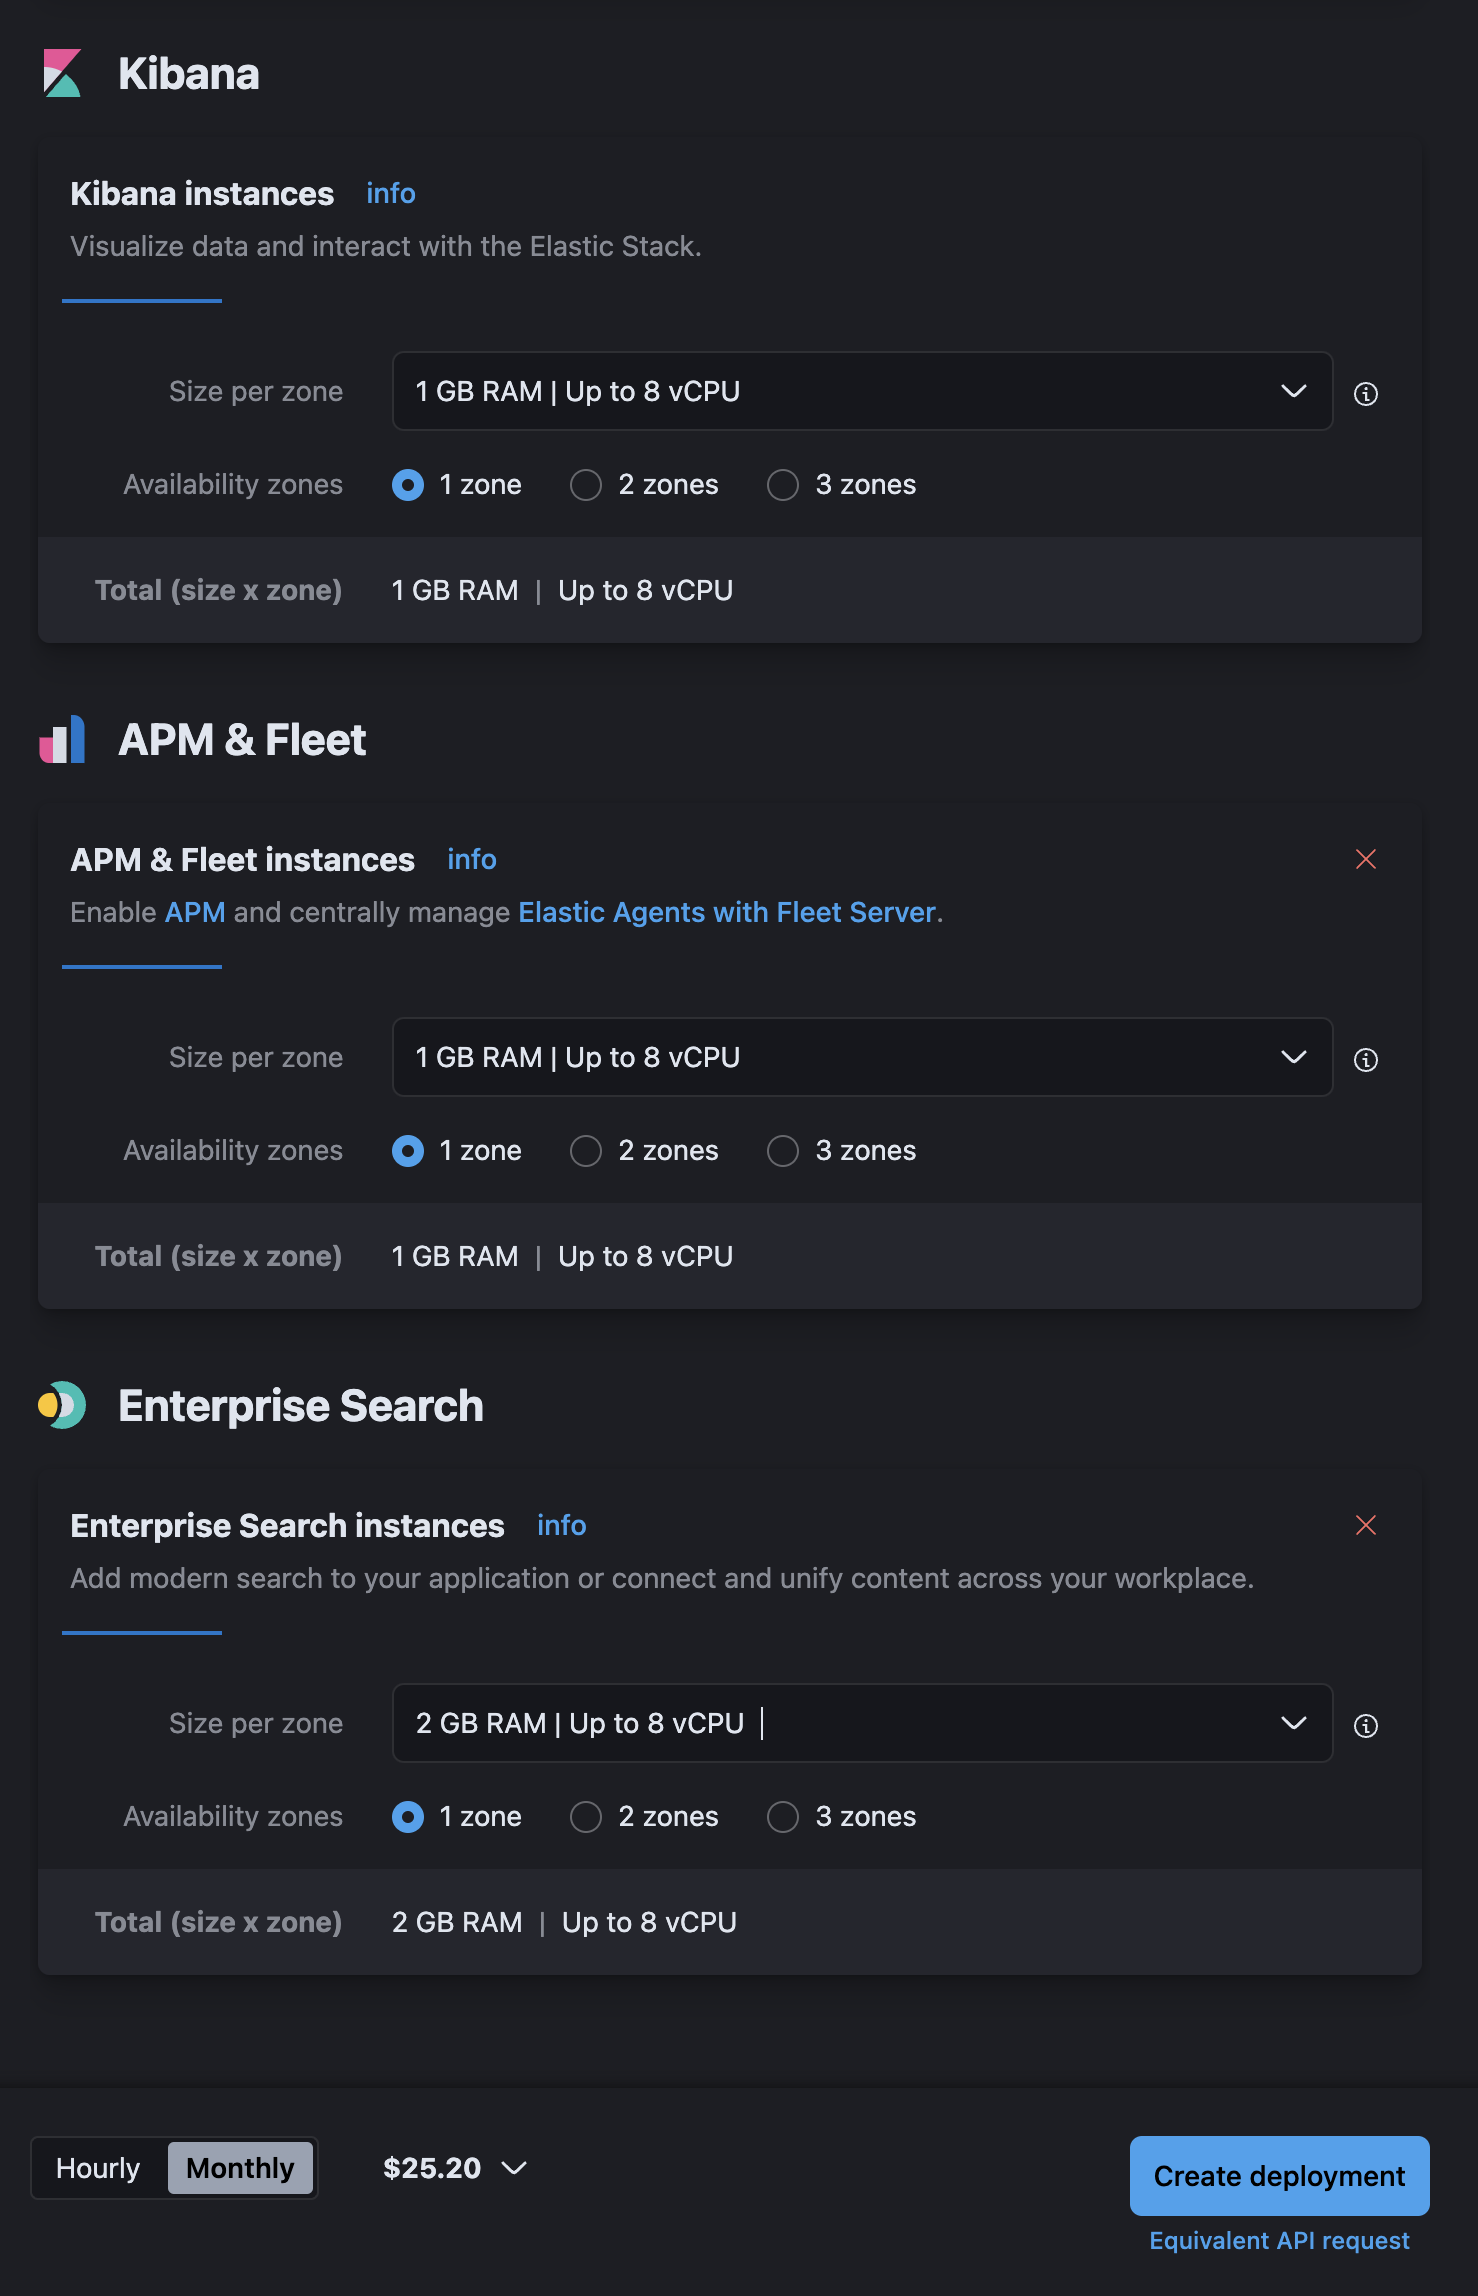
한달치 예상금액을 알려준다(생각보다 이게 참 편했다)
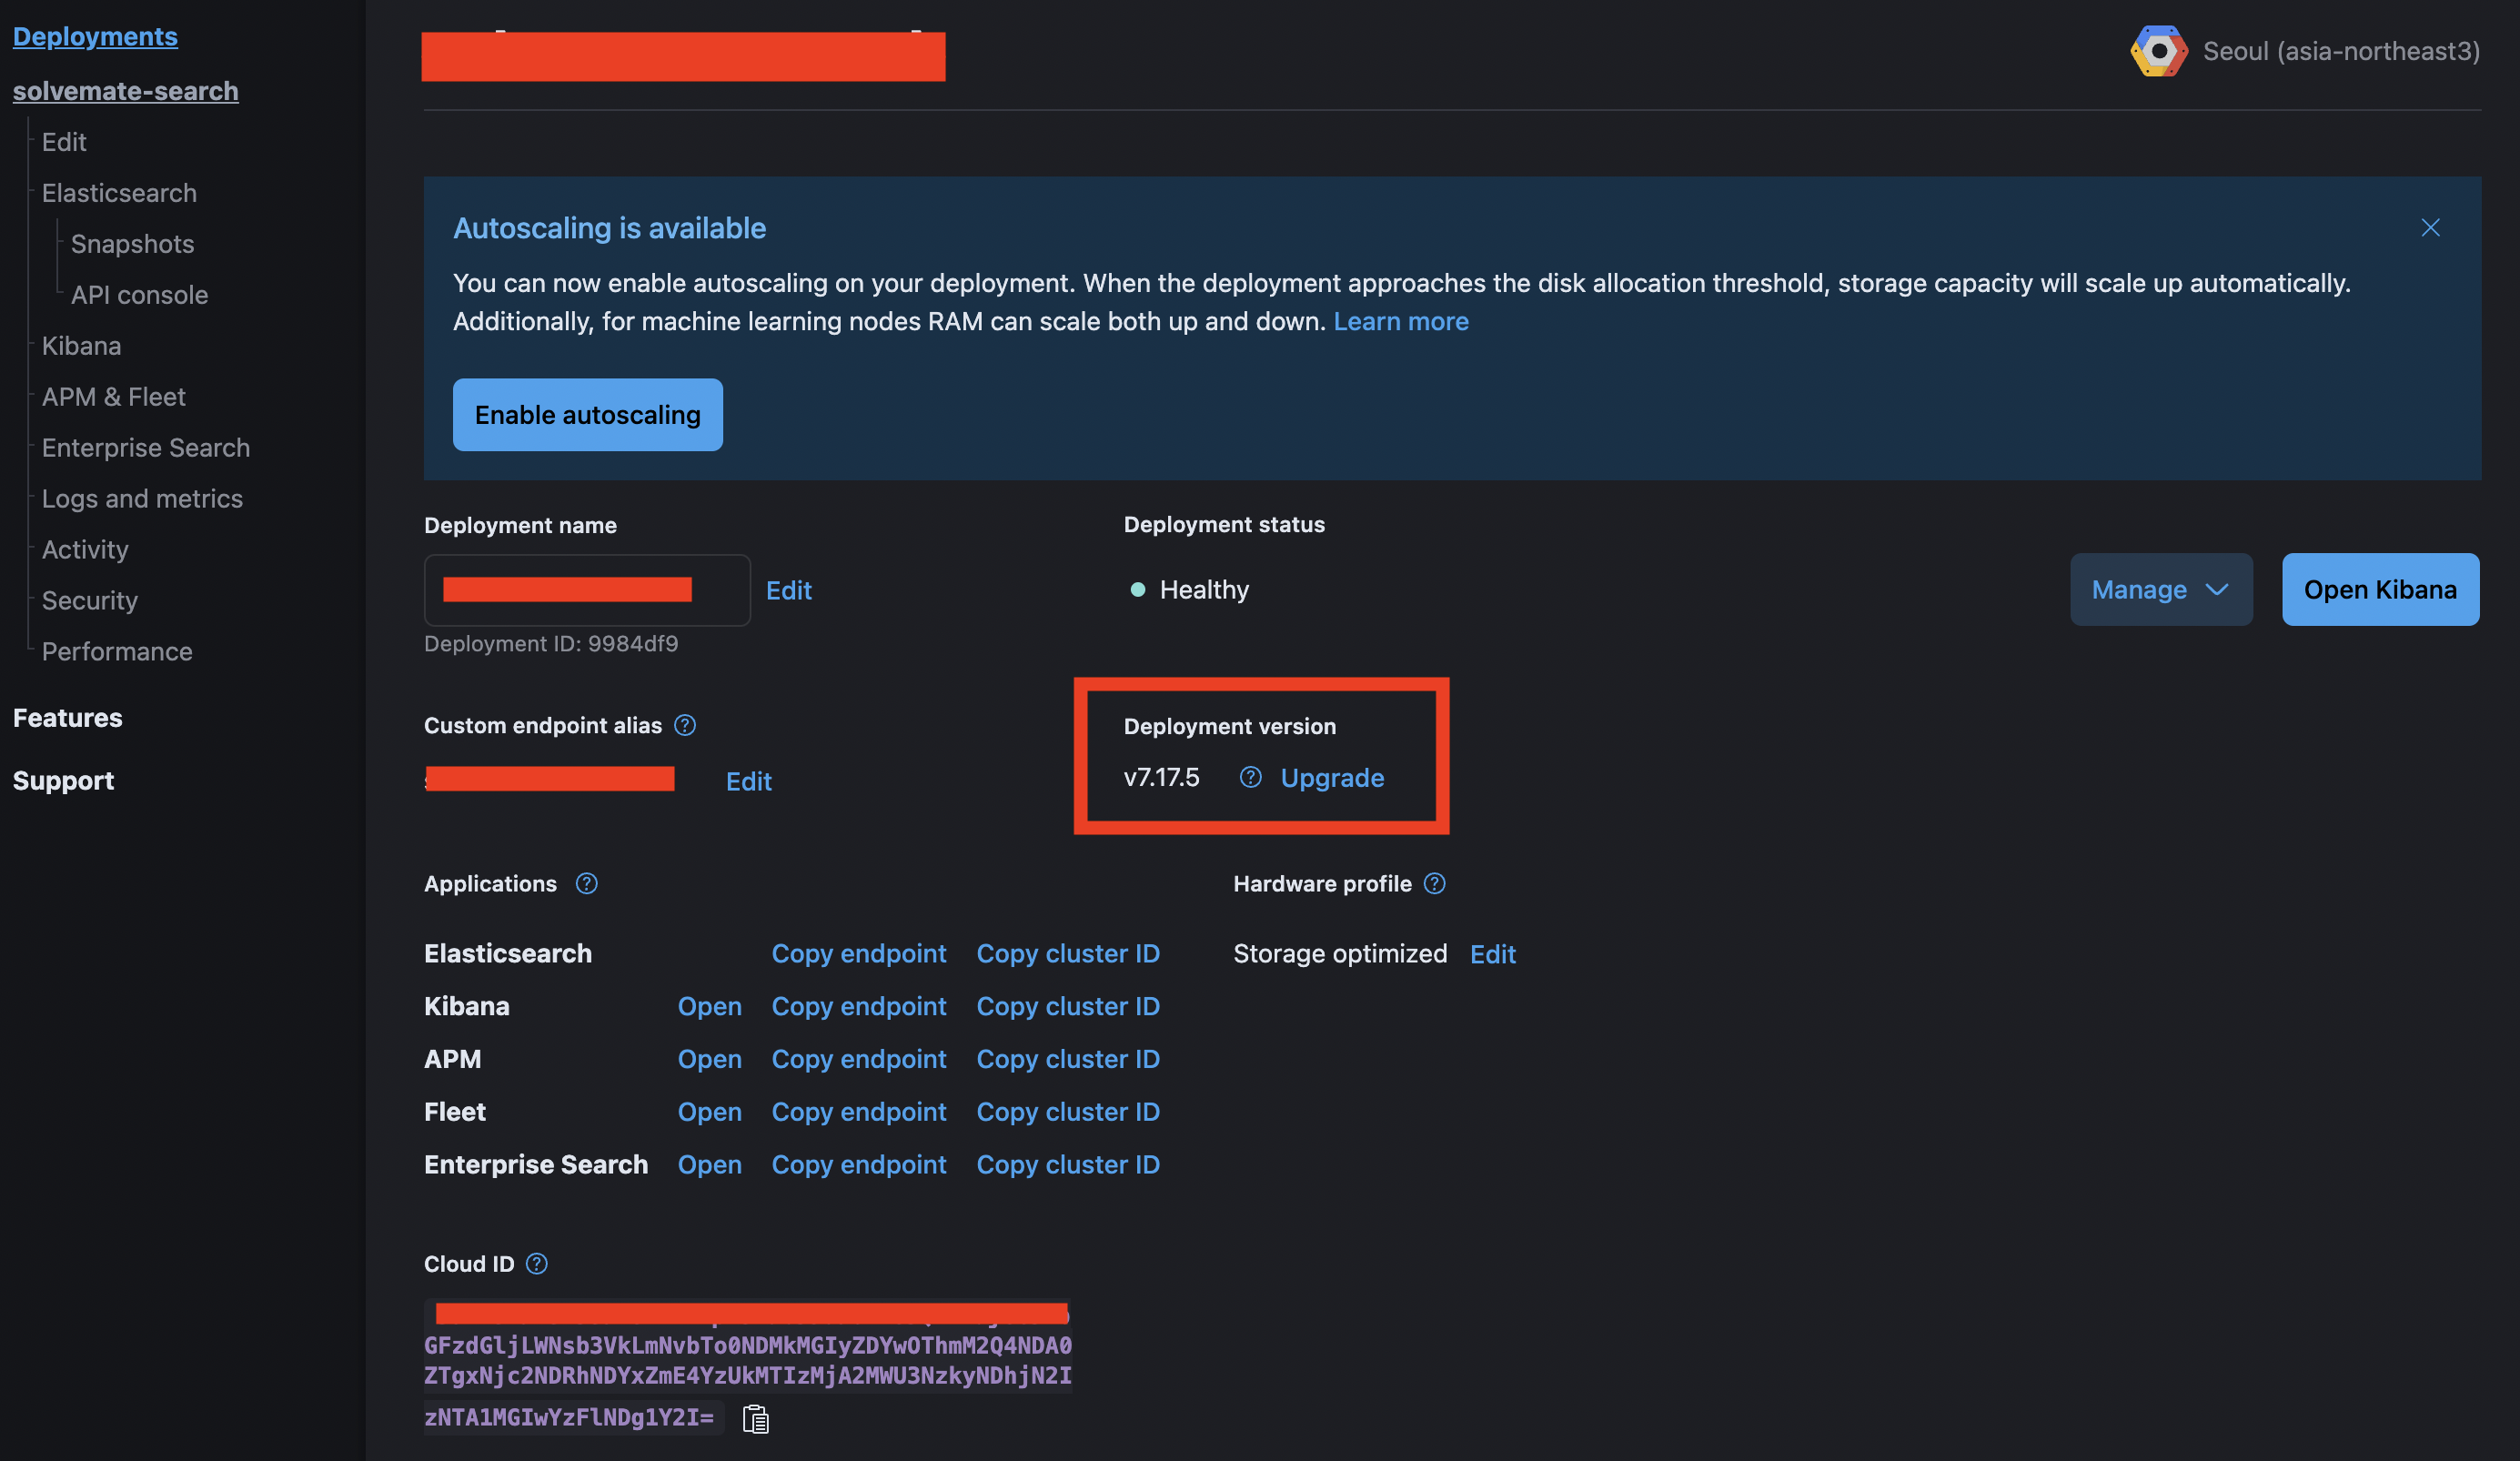
create deployment를 클릭하면 deployments 화면으로 이동하여 상세정보를 알려준다.
참고로 생성되기 전에 계정정보(username, password)를 알려주는데 그것은 따로 기록해두도록 한다. 이후 Spring에서 접근할때 사용된다.
배포가 완료되면 아래와 같은 화면으로 접근이 된다.
반드시 버전이 7.x 이어야 한다.(위에서 설명)
그럼 이제부터 springboot에서 설정하는것을 살펴보도록 하자
SpringBoot 에 elastic search 연동하기
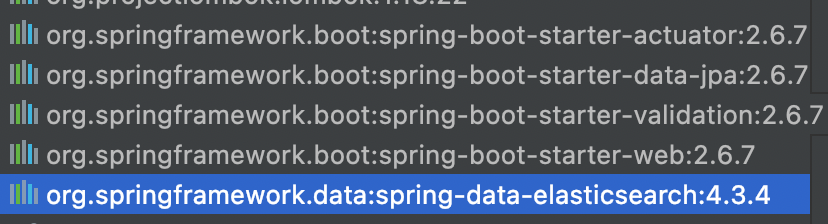
여기서는 gradle을 사용해서 아래와같이 설정을 추가해준다.
버전을 명시하지 않으니 자동으로 4.3.4 버전으로 설정되어 있다.(현재 4.4.1 까지 나와있는 상태)
...
implementation group: 'org.springframework.data', name: 'spring-data-elasticsearch'
...
https://mvnrepository.com/artifact/org.springframework.data/spring-data-elasticsearch
Maven Repository: org.springframework.data » spring-data-elasticsearch
Spring Data Implementation for Elasticsearch VersionVulnerabilitiesRepositoryUsagesDate4.4.x4.4.1Central1Jun, 20224.4.0Central2May, 20224.3.x4.3.5Central1Jun, 20224.3.4Central4Apr, 20224.3.3Central3Mar, 20224.3.2Central2Feb, 20224.3.1Central4Jan, 20224.3.0
mvnrepository.com
그럼 Config 설정을 해보자.
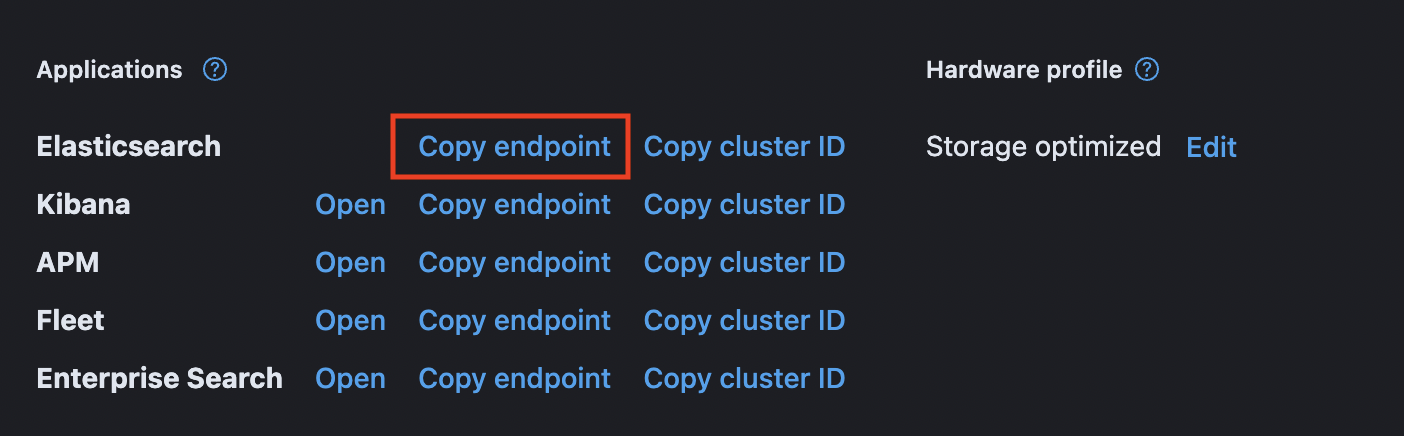
elastic deployment 페이지에 보면 ElasticSearch에 Copy endpoint가 있다. 클릭하면 엔드포인트가 복사된다
이제 Config 관련 파일을 작성하자
위에서 복사한 경로는 아래 host에 넣어준다.
그 외 계정과 비밀번호를 넣는다.
@Configuration
public class ElasticSearchConfig {
    private static final String host = "[프로젝트이름].es.asia-northeast3.gcp.elastic-cloud.com:443";
    private static final String username = "[접속유저id]";
    private static final String password = "[비밀번호]";

    @Bean
    public RestHighLevelClient client() {
        ClientConfiguration clientConfiguration = ClientConfiguration.builder()
                .connectedTo(host)
                .usingSsl()
                .withBasicAuth(username, password)
                .build();
        return RestClients.create(clientConfiguration)
                .rest();
    }

    @Bean
    public ElasticsearchOperations elasticsearchTemplate() {
        ElasticsearchRestTemplate elasticsearchRestTemplate = new ElasticsearchRestTemplate(client());
        return elasticsearchRestTemplate;
    }
}
host를 넣을때 주의할점이 있는데 https:// 부분을 제거해야 한다. 그리고 끝에 포트번호 443 을 붙여주어야 한다.
만약 포트번호가 없으면 자동으로 9200 으로 접속하는데, Elastic Cloud에서는 자동으로 제공되는 도메인을 활용하지 않으면 Connection에 실패한다.
| org.springframework.data.elasticsearch.UncategorizedElasticsearchException: java.util.concurrent.ExecutionException: java.net.ConnectException: Timeout connecting to [[프로젝트ID].es.asia-northeast3.gcp.elastic-cloud.com/[도메인에 연결된IP]:9200]; nested exception is ElasticsearchException[java.util.concurrent.ExecutionException: java.net.ConnectException: Timeout connecting to [[프로젝트ID].es.asia-northeast3.gcp.elastic-cloud.com/[도메인에 연결된IP]:9200]]; nested: ExecutionException[java.net.ConnectException: Timeout connecting to [[프로젝트ID].es.asia-northeast3.gcp.elastic-cloud.com/[도메인에 연결된IP]:9200]]; nested: ConnectException[Timeout connecting to [[프로젝트ID].es.asia-northeast3.gcp.elastic-cloud.com/[도메인에 연결된IP]:9200]]; |
443을 붙여주는 이유는 https 로 접근이 가능하기 때문이다.
Https 를 붙이면 다음과 같은 에러가 발생한다.
| org.springframework.data.elasticsearch.UncategorizedElasticsearchException: java.util.concurrent.ExecutionException: java.net.UnknownHostException: https://[프로젝트ID].es.asia-northeast3.gcp.elastic-cloud.com:443: nodename nor servname provided, or not known; nested exception is ElasticsearchException[java.util.concurrent.ExecutionException: java.net.UnknownHostException: https://[프로젝트ID].es.asia-northeast3.gcp.elastic-cloud.com:443: nodename nor servname provided, or not known]; nested: ExecutionException[java.net.UnknownHostException: https://[프로젝트ID].es.asia-northeast3.gcp.elastic-cloud.com:443: nodename nor servname provided, or not known]; nested: UnknownHostException[https://[프로젝트ID].es.asia-northeast3.gcp.elastic-cloud.com:443: nodename nor servname provided, or not known]; |
https는 붙여주되 포트번호가 없는경우 다음 에러가 발생한다.
| Failed to instantiate [org.elasticsearch.client.RestHighLevelClient]: Factory method 'client' threw exception; nested exception is java.lang.IllegalArgumentException: Cannot parse port number: https://[프로젝트ID].es.asia-northeast3.gcp.elastic-cloud.com |
그래서 https:// 를 제거하고 포트번호를 443을 붙여주어야 한다.
옵션중에 usingSsl() 이 있는데 이것은 https를 사용하기에 꼭 붙여주어야 한다.
그리고 auth인증으로 username과 password를 입력해야 하기 때문에 설정에 추가되었다.
ElasticsearchRestTemplate 를 bean으로 만든것은 사용편리성을 위한 것이다.
이것은 취향에 따라 다른데, 어떤곳은 ElasticsearchOperations 를 쓰기도 한다. 역시 취향차이다.
마지막으로 @EnableElasticsearchRepositories 를 사용하지 않았는데 이유는 간단하다.
현업에서는 query를 보다 복잡하게 사용할 것 같았기 때문이다. 물론 spring data에서 제공하는 Repository 인터페이스를 이용해서 쉽게 만들 수도 있겠지만 굳이 그렇게 하지 않아도 된다고 생각했고, 어차피 엘라스틱서치 사용법에 대해 익숙하면 직접 프로그래밍으로 핸들링하는게 낫다고 생각했기 때문이다.
그럼 이제 elastic을 이용한 조회를 만들어보자
SpringBoot 에서 elastic search 조회하기
우선 엔티티를 만들어야 한다.
JPA와 비슷한 형태로 만들 수 있는데 @Entity 대신 @Document가 붙는다
import org.springframework.data.elasticsearch.annotations.Document;
import org.springframework.data.elasticsearch.annotations.Field;

@Document(indexName = "entity_math")
@NoArgsConstructor
@Getter
public class EsMath {
    @Id
    private String id;

    @Field(name = "name")
    private String name;
}
@Document 에 지정되어있는 indexName은 엘라스틱서치에서 사용되는 index의 이름이다. RDB로 치면 테이블 이름이라고 보면 될거같다. @Field는 RDB로 보면 Column 이라고 보면 될듯 하다.
이렇게 만든 뒤 검색 해보도록 하자.
SearchQuery 객체를 만든다음 search 로 던져주어야 한다.
...
    @Autowired
    ElasticsearchRestTemplate template;

    @Test
    void search() {
        QueryStringQueryBuilder builder = QueryBuilders
                .queryStringQuery("소인수분해 자연수");

        PageRequest pageable = PageRequest.of(0, 20);

        NativeSearchQuery searchQuery = new NativeSearchQuery(builder);
        searchQuery.setPageable(pageable);
        SearchHits<EsMath> search = template.search(searchQuery, EsMath.class);
        System.out.println("search.getTotalHits() = " + search.getTotalHits());

        List<SearchHit<EsMath>> searchHits = search.getSearchHits();
        System.out.println("searchHits.size() = " + searchHits.size());
        for (SearchHit<EsMath> searchHit : searchHits) {
            EsMath math = searchHit.getContent();
            System.out.println("math.getName() = " + math.getName());
        }
    }
콘솔을 보면 다음처럼 출력된다.
총 갯수는 28개인데, 페이징이 적용되어 20개만 hits에 포함되어 리턴되었다.
search.getTotalHits() = 28
searchHits.size() = 20
math.getName() = 소인수분해
math.getName() = 제곱근 A * x의 꼴을 자연수로 만들기
math.getName() = 유리수와 무리수
math.getName() = 식이 주어진 경우 이차방정식의 활용
math.getName() = 약수와 배수
math.getName() = 제곱인 수 만들기
math.getName() = 지수법칙의 확대 - 밑이 다른 경우
math.getName() = 순환소수의 대소 관계
math.getName() = 소인수 구하기
math.getName() = 서로소
math.getName() = 약수의 개수가 주어질 때
math.getName() = 제곱근 A +- x의 꼴을 자연수로 만들기
math.getName() = 지수법칙(종합)
math.getName() = 수에 대한 이차방정식의 활용(연속하는 수)
math.getName() = 소수와 합성수
math.getName() = 지수법칙의 응용(같은 수의 덧셈식 간단히 하기)
math.getName() = 공약수와 최대공약수
math.getName() = 거듭제곱
math.getName() = 해에 대한 조건이 주어진 방정식
math.getName() = 확률의 덧셈과 곱셈
다시 코드로 돌아가면 paging을 설정할 수 있다.
페이징은 0번부터 카운팅되며 20개를 가져오게 했으며 setPageable로 넣었다.
(Page는 Spring Data 에서 공통으로 쓰는 Pageable을 사용할 수 있다)
...
        PageRequest pageable = PageRequest.of(0, 20);

        NativeSearchQuery searchQuery = new NativeSearchQuery(builder);
        searchQuery.setPageable(pageable);
...
Paging 설정을 생략하면 기본값으로 10개를 출력한다.
SpringBoot 에서 elastic search bulk 하기
IndexQuery 객체를 생성하여 bulk를 할 수 있다. buik 말고 단일 index를 할때에도 해당 객체를 사용한다.
사용법은 다음과 같다.
...
    @Autowired
    ElasticsearchRestTemplate template;

    @Test
    void bulk() {
        EsMath math1 = new EsMath();
        math1.setId("test_1");
        math1.setName("삼각함수");
        IndexQuery query1 = new IndexQueryBuilder()
                .withId("test_1")
                .withObject(math1)
                .build();

        EsMath math2 = new EsMath();
        math2.setId("test_2");
        math2.setName("순환소수의 대소 관계");
        IndexQuery query2 = new IndexQueryBuilder()
                .withId("test_2")
                .withObject(math2)
                .build();

        List<IndexQuery> queries = Arrays.asList(query1, query2);
        template.bulkIndex(queries, EsMath.class);
    }
IndexQuery를 복수개 만든 다음 객체에 담아서 template.bulkIndex를 실행한다.
두번째 파라미터에는 객체클래스를 넣는다.
객체 대신에 인덱스 이름을 직접 설정하는 방법도 있는데 다음과 같다.
...
    // template.bulkIndex(queries, EsMath.class);
    template.bulkIndex(queries, IndexCoordinates.of("entity_math"));
...
IndexCoordinates를 사용하면 인덱스를 복수개 입력도 가능하다.(콤마(',') 구분)
잘 저장되었는지 확인해보자.
Elastic Cloud -> Deployment -> Kibana -> Dev Tools 를 통해 웹으로 접속하면 쿼리를 질의할 수 있는 화면으로 이동할 수 있다.
데이터를 조회해보니 잘 들어갔다.

끝.
'공부 > 프로그래밍' 카테고리의 다른 글
| [react, nextjs] pwa 적용 후 console.log 에 werkbox 없애기 (0) | 2022.08.12 |
|---|---|
| 2022년 상반기 회고록 (0) | 2022.07.21 |
| [querydsl] Unable to load class 'com.mysema.codegen.model.Type' 에러 (0) | 2022.07.14 |
| [GCP] 로드밸런싱(부하분산) 설정 + SSL 인증서 공짜로 받기 (5) | 2022.07.11 |
| [GCP] 외부에서 구매한 도메인 등록 & VM IP에 연결 (7) | 2022.07.08 |


댓글