OAuth2 역할은 크게 4가지로 분류된다
- Resource Owner
- Authorization Server
- Resource Server
- Client
:: Resource Owner는 유저를 뜻한다. 내가 만든 서비스를 이용하고자 하는 고객을 의미한다
:: Authorization Server는 인증서버를 말한다. 이 요청은 요청을 보낸 고객이 우리가 인증할 수 있는 고객인지(우리 고객이 맞는지)를 확인해주는 역할을 한다. 만약 데이터베이스로 유저를 관리하고 있다면 고객인지를 확인하고(ID와 패스워드 비교 등 파악) 유효시 access_token을 발급하여 리턴한다.
:: Resource Server는 자원(API 등)이 있는 서버를 말한다. access_token을 통해 접근하여 자원을 활용할 수 있다.
:: Client 서드파티앱을 말한다.
Spring Security Oauth 를 이용하면 Authorization Server와 Resource Server를 한 서버내에 만들 수 있다. 대체로 추천하는 방법은 아닌듯 하지만 MSA(Micro Service Architecture)형태로 관리하는게 아니라면 한곳에 만들지 않을까 싶다.
그리고 이건 다른 우려인데, 2019년 11월 24일 Spring Security 블로그에서 Authorization Server의 지원을 중지한다는 글을 발표했다. 글 내용에 따르면 Spring Security 에서 Authorization Server지원이 적합하지 않다고 판단했고, 오픈 소스 인증 서버가 많이 있다고 생각해 더이상 지원하지 않기로 결정했다고 한다.
Spring 블로그:
https://spring.io/blog/2019/11/14/spring-security-oauth-2-0-roadmap-update
https://github.com/spring-projects/spring-security/wiki/OAuth-2.0-Migration-Guide
블로그에 작성된 오픈소스 중 하나로는 Keycloak 가 있는데, 아직 나도 써보지 않았다.
그래서 실제로 가장 최근 코드인 Spring Security Oauth2 2.4.0 버전을 dependency하면 @EnableAuthorizationServer 가 deprecated 되어있다. 그러니 개발에 앞서 꼭 고려했으면 한다.

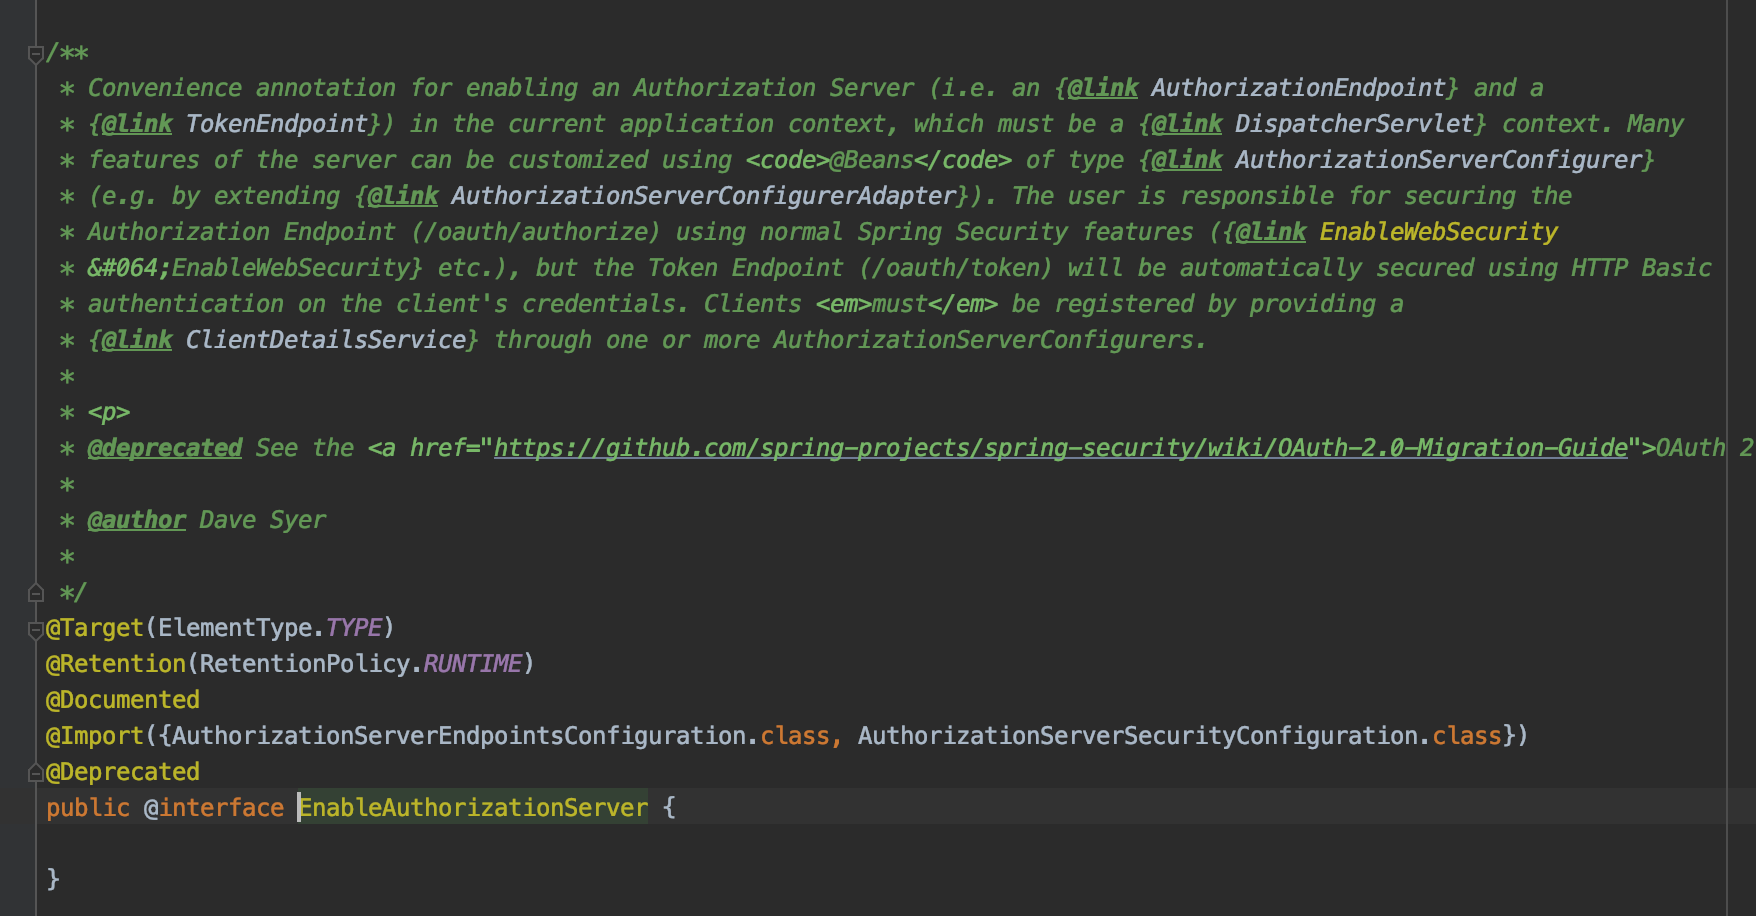
어찌됐든 이전버전까지는 되니 여기서는 deprecated 되기 전 버전을 사용했다.
설정부분을 보자
@Configuration
@EnableAuthorizationServer
public class AuthorizationServerConfigurer extends AuthorizationServerConfigurerAdapter {

    AuthenticationManager authenticationManager;
    public AuthorizationServerConfigurer(AuthenticationConfiguration authenticationConfiguration) throws Exception {
        this.authenticationManager = authenticationConfiguration.getAuthenticationManager();
    }

    @Override
    public void configure(AuthorizationServerEndpointsConfigurer endpoints) {
        endpoints.authenticationManager(authenticationManager);
    }

    @Override
    public void configure(AuthorizationServerSecurityConfigurer security) throws Exception {
        // 토큰유효성(/token/check_token) 접근을 위해 설정
        security.checkTokenAccess("permitAll()");
    }

    @Override
    public void configure(
            ClientDetailsServiceConfigurer clients) throws Exception {

        clients.inMemory()
                .withClient("testClientId")
                .secret("{noop}testSecret")
                .redirectUris("/oauth2/callback")
                .authorizedGrantTypes("authorization_code", "password", "refresh_token")
                .scopes("read", "write")
                ;
    }
}
AuthorizationServerConfigurerAdapter 를 구현하여 인증방식을 구현할 수 있다. 여기서 client_id와 secret을 등록한다. 등록된 키는 나중에 /oauth/token을 호출할 때 header에 Authorization 을 넣는 값이 된다. 예를들면 다음과 같은 형태다.
String clientId = "AAA";
String secret = "BBB";
String credentials = clientId + ":" + secret;
String encodedCredentials = new String(Base64.encode(credentials.getBytes()));
/oauth/token 을 호출할때 위에서 생성된 encodedCredentials 값을 Header 내 Authorization 에 넣어줘야 한다.
{Authorization: Basic dGVzdENsaWVudElkO...}
나중에 관련 코드를 구현한 부분이 있으니 그렇구나 하고 넘어가면 되겠다.
그리고 위 설정중에 authorizedGrantTypes 부분이 있는데, 사실상 사용할 것만 등록하는것이 맞다. 다만 authorization_code를 설정할 경우 redirect_url을 반드시 설정해줘야 하고, 관련 컨트롤러도 구현해야 한다. (redirect_url 을 호출하면서 code를 전달하고 받은 code로 유효성을 검사하기 때문)

하지만 password 방식으로만 한다면 redirect_url을 구성할 필요가 없다.
여기서는 공부하는 단계이니 authorization_code와 password 둘다 설정해 두었다.
다음은 WebSecurityConfigurerAdapter 에 대한 설정이다.
@Configuration
@EnableWebSecurity
public class SecurityConfig extends WebSecurityConfigurerAdapter {
    @Override
    protected void configure(HttpSecurity security) throws Exception {
        security
                .csrf().disable()
                .headers().frameOptions().disable()
                .and()
                .authorizeRequests()
                    .antMatchers("/oauth/authorize").permitAll()
                    .antMatchers("/oauth/**", "/oauth2/callback").permitAll()
                .and()
                .formLogin().and()
                .httpBasic();
    }
}
/oauth/authorize 와 /oauth/token, 그리고 /oauth2/callback 부분은 열어두었다.
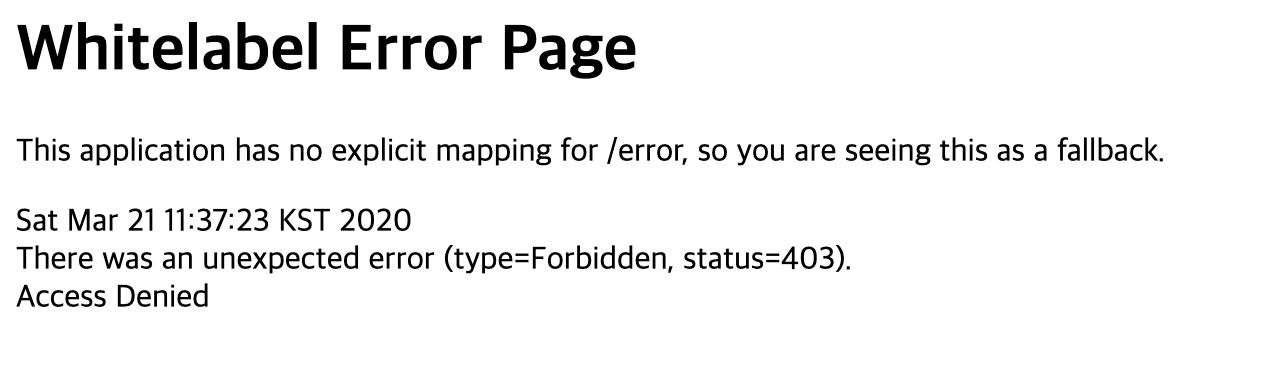
그리고 formLogin 을 넣어두었는데, security 에서 url을 인증받지 못하면 통과시키지 않기 때문이다. 만약빼고 /oauth/authorize 를 시도하려고 하면 다음과 같은 401 에러가 발생한다.
브라우저로 호출한 url구성은 다음과 같다
http://localhost:8080/oauth/authorize?client_id=testClientId&response_type=code
formLogin 을 설정하면 다음처럼 로그인을 물어본다.

문제는 아직까지 로그인을 성공할만한 어떤 계정도 등록하지 않아서 무엇을 입력하든 실패할 것이다. 그래서 로그인을 할 수 있도록 계정을 등록ㅎ줘야 한다. DB에서 관리하는 방법도 있겠지만 inMemory에서 하는 방법도 있다.
InMemory 등록 방법
@Configuration
@EnableWebSecurity
public class SecurityConfig extends WebSecurityConfigurerAdapter {
    @Override
    protected void configure(HttpSecurity security) throws Exception {
        security
                .csrf().disable()
                .headers().frameOptions().disable()
                .and()
                .authorizeRequests()
                    .antMatchers("/oauth/authorize").permitAll()
                    .antMatchers("/oauth/**", "/oauth2/callback", "/h2-console/*").permitAll()
                .and()
                .formLogin().and()
                .httpBasic()
                ;
    }

    // 이부분 추가
    @Override
    protected void configure(AuthenticationManagerBuilder auth) throws Exception {
        auth.inMemoryAuthentication()
                .withUser("user")
                .password("{noop}pass")
                .roles("USER");
    }
}
브라우저를 띄워 다음을 입력해보자
http://localhost:8080/oauth/authorize?client_id=testClientId&response_type=code그럼 다음창이 나오며 승인을 묻는다.
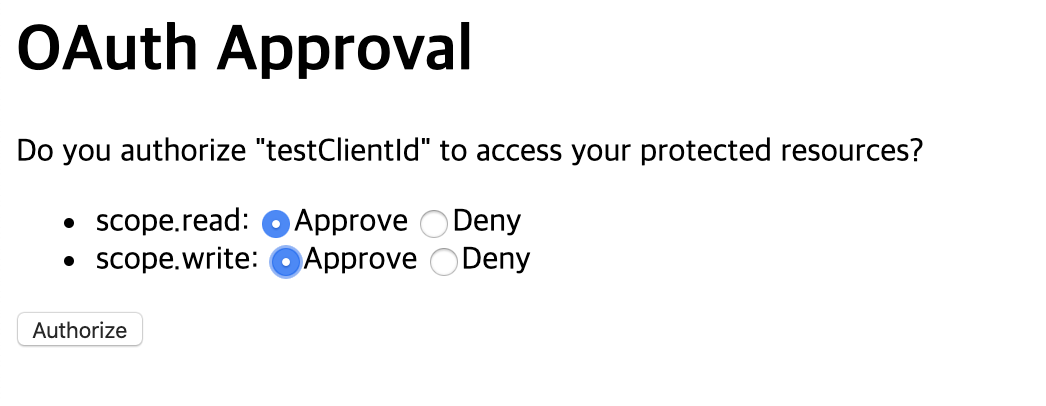
이 창을 생략하고 싶다면 생성한 AuthorizationServerConfigurer 파일에서 .autoApprove(true) 를 추가한다.
@Configuration
@EnableAuthorizationServer
public class AuthorizationServerConfigurer extends AuthorizationServerConfigurerAdapter {

    AuthenticationManager authenticationManager;
    public AuthorizationServerConfigurer(AuthenticationConfiguration authenticationConfiguration) throws Exception {
        this.authenticationManager = authenticationConfiguration.getAuthenticationManager();
    }

    @Override
    public void configure(AuthorizationServerEndpointsConfigurer endpoints) {
        endpoints.authenticationManager(authenticationManager);
    }

    @Override
    public void configure(
            ClientDetailsServiceConfigurer clients) throws Exception {

        clients.inMemory()
                .withClient("testClientId")
                .secret("{noop}testSecret")
                .autoApprove(true)  // 이부분
                .redirectUris("http://localhost:8080/oauth2/callback")
                .authorizedGrantTypes("authorization_code", "password", "refresh_token")
                .scopes("read", "write")
                ;
    }
}
authorize 버튼을 클릭하면 redirect_url 에 등록한 URL을 호출한다.
이번에는 redirect_url 에 등록한 /oauth2/callback 을 구현하자
참고로 grant_type 을 password 형태로만 만들거라면 사실 redirect_url 을 구현할 필욘 없다.
@RestController
@AllArgsConstructor
public class OauthController {
    private RestTemplate restTemplate;
    private ObjectMapper objectMapper;

    @GetMapping("/oauth2/callback")
    public String callback(@RequestParam String code) throws JsonProcessingException {
        System.out.println("code = " + code);

        OauthTokenDto token = getToken(code);
        System.out.println("getToken() = " + token);

        return token.toString();
    }

    /**
     * token을 호출하여 access_token 획득
     * @param code
     * @return
     * @throws JsonProcessingException
     */
    private OauthTokenDto getToken(String code) throws JsonProcessingException {
        String credentials = "testClientId:testSecret";
        String encodedCredentials = new String(Base64.encode(credentials.getBytes()));

        HttpHeaders headers = new HttpHeaders();
        headers.setContentType(MediaType.APPLICATION_FORM_URLENCODED);
        headers.add("Authorization", "Basic " + encodedCredentials);

        MultiValueMap<String, String> params = new LinkedMultiValueMap<>();
        params.add("code", code);
        params.add("grant_type", "authorization_code");
        HttpEntity<MultiValueMap<String, String>> request = new HttpEntity<>(params, headers);
        ResponseEntity<String> response = restTemplate.postForEntity("http://localhost:8080/oauth/token", request, String.class);
        if (response.getStatusCode() == HttpStatus.OK) {
            System.out.println("response.getBody() = " + response.getBody());
            OauthTokenDto oauthTokenDto = objectMapper.readValue(response.getBody(), OauthTokenDto.class);
            return oauthTokenDto;
        }
        return null;
    }

    @Getter
    @ToString
    static class OauthTokenDto {
        private String access_token;
        private String token_type;
        private String refresh_token;
        private long expires_in;
        private String scope;
    }
}
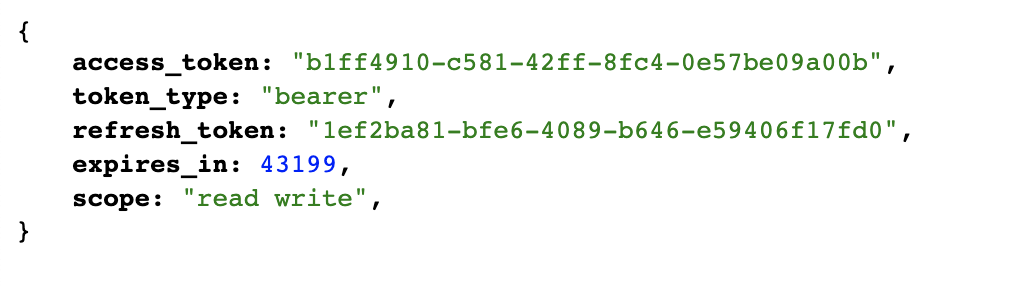
callback 으로 임의 생성된 code가 리턴되고, 그 값을 파라미터에 넣어 /oauth/token 을 호출한다. 만약 code를 넣지 않거나 임으로 생성하여 호출하면 500에러가 발생한다.
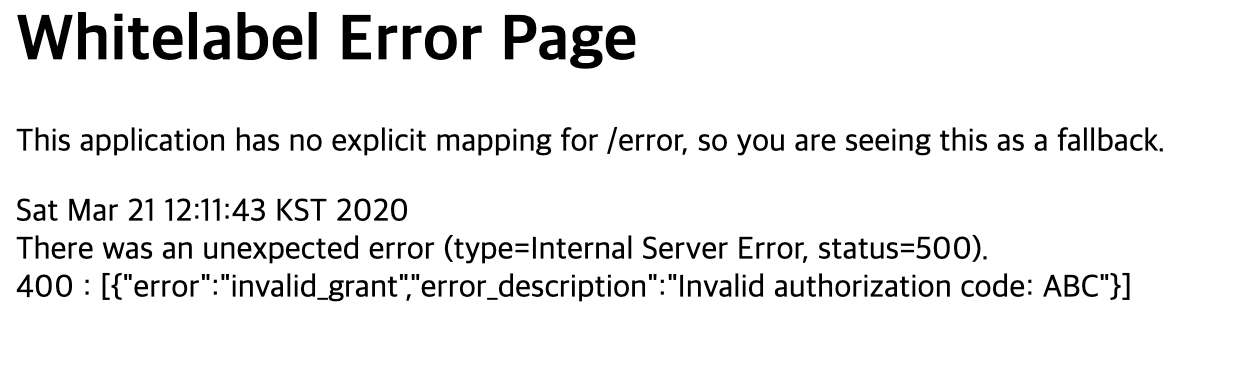
제대로 호출이 완료된다면 access_token을 받을 수 있다.
그런데 이렇게만 끝내면 문제가 하나 있다. 바로 grant_type 이 password일때 제대로 작동하지 않는다는 점이다.
password 형태로 호출하기 위해 다음처럼 구성한다
curl -d grant_type=password \
-d client_id=testClientId	\
-d username=user 	\
-d password=pass 	\
-d scope=read write	\
-H "Authorization: Basic dGVzdENsaWVudElkOnRlc3RTZWNyZXQ=" 	\
-X POST http://localhost:8080/oauth/token
헤더에 들어갈 Authorization의 값은 디버깅해서 받아낸 값이다.
문제는 다음의 에러다
{"error":"invalid_grant","error_description":"자격 증명에 실패하였습니다."}
이 부분을 아무리 설정을 찾아보고 내부 디버깅을 해도 해결되지 않았다. 그래서 InMemory 형태를 제거하고 AuthenticationProvider를 직접 구현하여 처리하도록 변경했다. 우선 InMemory 로 등록한 것을 주석처리한다.
@Configuration
@EnableWebSecurity
public class SecurityConfig extends WebSecurityConfigurerAdapter {
    @Override
    protected void configure(HttpSecurity security) throws Exception {
        security
                .csrf().disable()
                .headers().frameOptions().disable()
                .and()
                .authorizeRequests()
                    .antMatchers("/oauth/authorize").permitAll()
                    .antMatchers("/oauth/**", "/oauth2/callback", "/h2-console/*").permitAll()
                .and()
                .formLogin().and()
                .httpBasic()
                ;
    }

//    @Override
//    protected void configure(AuthenticationManagerBuilder auth) throws Exception {
//        auth.inMemoryAuthentication()
//                .withUser("user")
//                .password("{noop}pass")
//                .roles("USER");
//    }
}
이번엔 AuthenticationProvider를 구현해보자
@Configuration
@RequiredArgsConstructor
public class OauthAuthenticationProvider implements AuthenticationProvider {

    @Override
    public Authentication authenticate(Authentication authentication) throws AuthenticationException {
        String username = (String) authentication.getPrincipal();
        String password = (String) authentication.getCredentials();
        System.out.println("authentication.username = " + username);
        System.out.println("authentication.password = " + password);

        // 테스트 유저 호출(만약 DB에 연동해서 불러온다면 대체해도 된다)
        TestUser testUser = new TestUser();

        if(password.equals(testUser.getPassword()) == false) {
            throw new BadCredentialsException(username);
        }

        return new UsernamePasswordAuthenticationToken(username, password, testUser.getAuthorities());
    }

    @Override
    public boolean supports(Class<?> authentication) {
        return authentication.equals(UsernamePasswordAuthenticationToken.class);
    }
}
테스트를 통과할 수 있을 유저를 등록한다
@Getter
public class TestUser {

    private String username = "user";
    private String password = "pass";
    private List<String> roles = new ArrayList<>();

    public Collection<? extends GrantedAuthority> getAuthorities() {
        return this.roles.stream().map(SimpleGrantedAuthority::new).collect(Collectors.toList());
    }
}
이제 터미널에서 /oauth/token을 다시 호출하자. 다만 파라미터가 조금 변경되었다.
username=등록한 username
password=등록한 password
grant_type=password
curl -d grant_type=password \
-d username=user 	\
-d password=pass 	\
-H "Authorization: Basic dGVzdENsaWVudElkOnRlc3RTZWNyZXQ=" 	\
-X POST http://localhost:8080/oauth/token
결과
{"access_token":"210b17ff-c6a6-4250-be1f-38be8a911289","token_type":"bearer","refresh_token":"20508a7e-44df-4370-8e5f-2aeb2bcf2650","expires_in":43199,"scope":"read write"}혹시 테스트케이스를 작성하려 한다면 다음과 같이 하면된다.
@ExtendWith(SpringExtension.class)
@SpringBootTest
@AutoConfigureMockMvc
class OauthControllerTest {

    @Autowired
    MockMvc mockMvc;


    @Test
    @DisplayName("oauth token 테스트")
    void oauthTokenTest() throws Exception {
        // given
        String clientId = "testClientId";
        String secret = "testSecret";
        MultiValueMap params = new LinkedMultiValueMap();
        params.add("grant_type", "password");
        params.add("username", "user");
        params.add("password", "pass");


        // when
        MvcResult result = mockMvc.perform(post("/oauth/token")
                .params(params)
                .with(httpBasic(clientId, secret))
                .accept(MediaType.APPLICATION_JSON_VALUE)
        ).andReturn();

        System.out.println("result = " + result);
        String contentAsString = result.getResponse().getContentAsString();
        System.out.println("body = " + contentAsString);

        // then
        Assertions.assertThat(contentAsString).contains("access_token").contains("refresh_token");
    }
}
우선 여기까지 완료해봤다.
다음에는 access_token을 DB에 저장하고 token과 client_id, username을 디비로 관리하는 것을 해보겠다.
2020.11.15 관련글 추가:
[springboot, security] AuthorizationServer 실무에 써먹게 설정
@EnableAuthorizationServer 을 설정하면 Authorization을 발급하는 서버로 지정된다. 이전 포스팅 참조. lemontia.tistory.com/927 [springboot, oauth] Authorization Server(인증서버) 구축하기 OAuth2 역할은..
lemontia.tistory.com
github 주소:
https://github.com/lemontia/spring_oauth-authorization_server-noDB
lemontia/spring_oauth-authorization_server-noDB
Contribute to lemontia/spring_oauth-authorization_server-noDB development by creating an account on GitHub.
github.com
참조:
https://jsonobject.tistory.com/363
Spring Boot, OAuth 2.0 서버 구현하기
개요 API 서버는 클라이언트에게 정보를 제공하기 위해 존재한다. 우리가 사는 집에는 열쇠가 있기 때문에 열쇠를 가진 사람만 드나들 수 있다. 마찬가지로 API 서버 또한 아무 클라이언트에게 모든 정보를 줄 수..
jsonobject.tistory.com
https://minwan1.github.io/2018/02/24/2018-03-11-Spring-OAuth%EA%B5%AC%ED%98%84/
Wan Blog
WanBlog | 개발블로그
minwan1.github.io
'공부 > 프로그래밍' 카테고리의 다른 글
| [querydsl, mysql] DATE_FORMAT 등 이용해 groupby 사용하기 (0) | 2020.04.02 |
|---|---|
| [springboot, oauth] Resource Server(자원서버) 구축하기 (0) | 2020.03.29 |
| [react + next.js] 페이지 이동(push, href 차이) (0) | 2020.03.19 |
| [spring] 테스트 중 Unable to initialize 'javax.el.ExpressionFactory' 해결하기 - validator 2.0.0(JSR-380) 적용 (0) | 2020.03.17 |
| [react] 다국어 처리(react-i18next) 적용하기 (1) | 2020.03.14 |


댓글